PHASE II: CONSTRUCTION
Armed with Joe's designs, I traveled to Wisconsin where my father-in-law Jon has graciously agreed to help build the library. Here's our reference material on the tailgate of his truck.
Jon has years of carpentry experience as well as the tools (and some leftover lumber!) to do the job. He and I begin cutting a 5/8" piece of plywood for the walls, floor, and roof of the library...
The mantra Jon recited (and the lesson for me) "Measure twice, cut once!"
I also saw some sawing action...
Glue, but which nails to use? (Wood screws.)
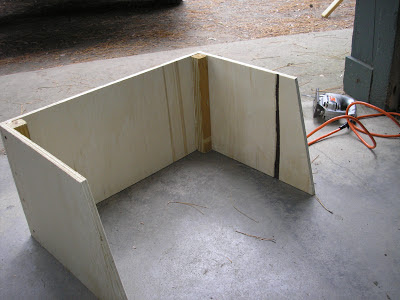
Nailing on the back was tricky because it was very easy to miss the board you're nailing into and end up with an unseated nail which could also splinter the board. I signed on as nail spotter...
The paparazzi are made...
Another discovery during construction (and an important one at that) since the entire facade is the door, we'll need to reinforce the side the hinges will be fastened to.
Jon wisely recommends reinforcing both sides so we can add the latch (latch type was undetermined at this point) and to give added support to the roof.
The comics shelf is a perfect fit!
We also grab a few books to test out the inside dimensions. When Joe was drawing up the plans, I'd asked for a minimum interior height of 12 inches...which we easily accomodated.
With the body of the library complete, we begin working on the facade/door. But it's late in the day, so we made some (very) rough marks on the door panel. For my money, this is the hardest part because if the proportions are off, it won't look right--whether we have a blueprint or not.
Jon measures to be sure we're making the door's "pillars" wide enough. It's difficult to describe why this is so important. Essentially, if the side "pillars" of the facade are too wide, then the window will look too small and out of proportion. If the pillars are too narrow, it will basically be a big glass door with little resemblance to the Hall of Justice.
We end here for the day.
A week or two later, Jon drops off the body and the door for sanding and painting by me. I've not seen the door until now...
IT'S FANTASTIC! Seriously, I didn't expect it to look this accurate or sturdy, if only because of the difficulty in getting the arch to look so good. And the side pillars are perfect. He did an amazing job!
Per Jon's instructions, I give each two coats of paint that has been mixed to match our house. Though I begged to paint superheroes all over it, I was informed by my better half that it should consider the relative curb appeal of our residence. So I took an leftover piece of our house siding to the hardware store and returned with a can of cool blue/gray.
MEANWHILE...
With painting complete, we return to Wisconsin to nail on the shingles and get the hardware (hinges, latch, etc.). The library is also measured so we can determine how big the base and post support will need to be.
If you look carefully in that last photo, inside at the top of the arch, you'll see another support Jon added to keep the roof level (the shingles add a lot of extra weight). You can also see the plexiglass window has been added (that was a nightmare to cut out).
Don't worry, for you little free library construction fans out there, we'll do a full diagram walk-through of the library in the final post with some additional images.
That's it for now--next up in the series: The Door!


No comments:
Post a Comment