Showing posts with label construction. Show all posts

Tuesday, March 12, 2013

Building the Library of Justice: Part 3 - The Door

We've already covered the planning stage, where we learned the door to the library would need to be the entire facade of the Hall of Justice. In the construction phase, we sort of whipped through the door's development. So this is a little more in-depth look at how the door's look and construction was accomplished.

The Arch is Everything!
The door is pretty much the key ingredient in the library's design that lends to its overall look. My friend Joe had drafted several wonderful blueprints and we finally decided that the arch would need to be the door. (Note: some of what follows is a recap of that earlier design post, so I'll summarize.)

The arch and pillar design is based on the iconic headquarters of a certain team of superheroes, maybe you've heard of them--the Justice League!

The Hall of Justice as featured in the Super Friends cartoon, featuring Batman, Superman, Wonder Woman, among others.


The action figure playset by Kenner had different dimensions and arch angle.
Joe used several references in his designs, but when it was time to construct the door for the Library of Justice, we used an amalgam of the proportions to maximize interior space without allowing the overall box and door becoming gargantuan. It turned out that the the block-y toy version provided a great basis for the arch curvature (though we did widen it out a bit from there).

A neat little bit of behind-the-scenes trivia: the Hall of Justice featured in hundreds of comics and cartoon episodes was itself modeled off of Cincinnati Union Terminal.


Fabricating the Facade
My father-in-law, Jon cut the facade from a piece of 2.5' square, .5" thick, piece of plywood using a jigsaw. He'd then added pieces of trim, layer-by-layer to help flesh out the pillars and window frames. He did all of this in about a week and I didn't see it until it was finished:


Jon's an incredible carpenter and he did an amazing job! The following week he brought me the box and door to sand and paint. I put (at least) two full coats on and did as much detail work as necessary to make sure all nooks and crannies were filled in. The really nerve-wracking part was still to come--the window glass...

Window Pane Horror!
Unfortunately, I don't have a picture of the plexiglass that Jon picked up for the door, but it's about .25" thick and was around 2' square. I was there that day to assist and it was slow, frightful work. Every time he put blade to glass could have spelled doom for our big bright window pane.

To make the cuts, he basically scored the glass thoroughly enough that we could chip pieces off the sides. We'd tried an electric saw on the edge of the glass, but it melted and created a blob on the seam. So it was just an old-fashioned x-acto blade to the rescue. 

When it came to the curve he went even more slowly and scored in smaller increments to achieve the rounded top. We only had enough glass to try twice. After cutting through about 3/4 of the first pane, a huge spidery crack ruined our first attempt.

SO WE WENT EVEN SLOOOOWER on the second try. As you can see, we were eventually rewarded with success:


We sanded the glass edges a bit to make sure it was safe to handle and then secured the window in place using glue and mirror clips around the edges. I was quite proud to have contributed that idea!

Weather Proofing and Hardware
One of the biggest challenges in weather-proofing the door was deciding how it would keep water out. Jon had already shingled the roof to help with watershed, but we needed a tight seal between the door and the box. We played with a few options, but ultimately the weather stripping you see in the photo above (placed on the door as well as on the box) was the best option. As of this writing, the stripping has been successful, but it will likely need to be replaced at least annually.

We fastened the hinges and latch hardware to the door and--voila! We had a finished library box!

Standard, finished hinges - as large as we could manage - were used to secure the heavy-duty door.

A simple latch was chosen so that kids could gain access without much fuss.

Next in our series we'll take a look at how the library was mounted on its base and placed in our yard in: INSTALLATION!

Monday, November 5, 2012

Building the Library of Justice: Part 2 - Construction

Once we had our blueprints carefully sketched by friend and architect Joe Allen, we were ready to begin the most exciting part....

PHASE II: CONSTRUCTION
Armed with Joe's designs, I traveled to Wisconsin where my father-in-law Jon has graciously agreed to help build the library. Here's our reference material on the tailgate of his truck.


Jon has years of carpentry experience as well as the tools (and some leftover lumber!) to do the job. He and I begin cutting a 5/8" piece of plywood for the walls, floor, and roof of the library...


The mantra Jon recited (and the lesson for me) "Measure twice, cut once!"

More cutting. I get to hold stuff!


I also saw some sawing action...


Jon realized during construction that we'll need some additional support on the bottom to provide support for the super, secret comics shelf, so we made a quick adjustment to by adding two 2" x 2" pieces that would act as bracers.


Glue, but which nails to use? (Wood screws.)


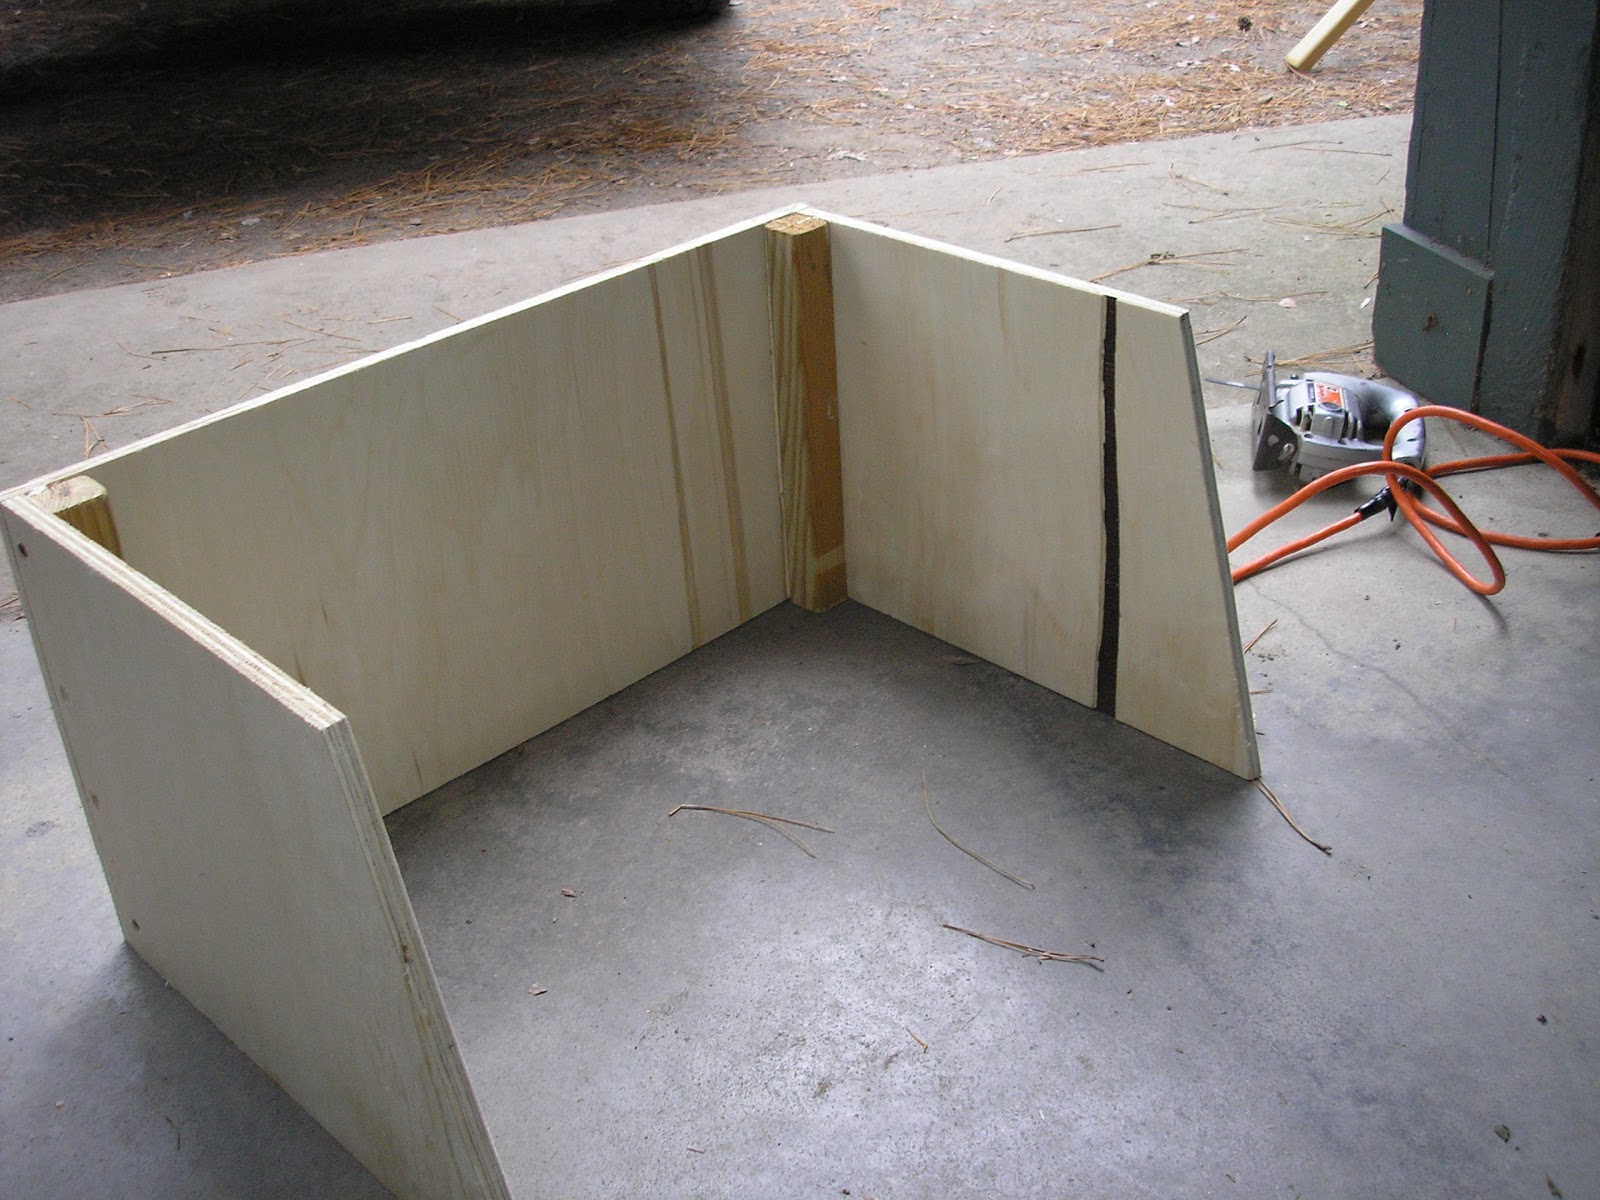
The main body of the library begins to take shape...


Nailing on the back was tricky because it was very easy to miss the board you're nailing into and end up with an unseated nail which could also splinter the board. I signed on as nail spotter...


The paparazzi are made...

Another discovery during construction (and an important one at that) since the entire facade is the door, we'll need to reinforce the side the hinges will be fastened to.

Jon wisely recommends reinforcing both sides so we can add the latch (latch type was undetermined at this point) and to give added support to the roof.


The comics shelf is a perfect fit!


Some clamps help keep the new roof supports in place while Jon attaches them...


The roof goes on! I do more nail spotting to make sure they all go in...


We also grab a few books to test out the inside dimensions. When Joe was drawing up the plans, I'd asked for a minimum interior height of 12 inches...which we easily accomodated.


With the body of the library complete, we begin working on the facade/door. But it's late in the day, so we made some (very) rough marks on the door panel. For my money, this is the hardest part because if the proportions are off, it won't look right--whether we have a blueprint or not.


Jon measures to be sure we're making the door's "pillars" wide enough. It's difficult to describe why this is so important. Essentially, if the side "pillars" of the facade are too wide, then the window will look too small and out of proportion. If the pillars are too narrow, it will basically be a big glass door with little resemblance to the Hall of Justice.

We end here for the day.

A week or two later, Jon drops off the body and the door for sanding and painting by me. I've not seen the door until now...


IT'S FANTASTIC! Seriously, I didn't expect it to look this accurate or sturdy, if only because of the difficulty in getting the arch to look so good. And the side pillars are perfect. He did an amazing job!


Per Jon's instructions, I give each two coats of paint that has been mixed to match our house. Though I begged to paint superheroes all over it, I was informed by my better half that it should consider the relative curb appeal of our residence. So I took an leftover piece of our house siding to the hardware store and returned with a can of cool blue/gray.
Facade, first coat in progress:


I don't think I've painted anything since I was 16 years old so, I went slowly and used a cloth to minimize goopiness. Here's a look at my shoddy work:


MEANWHILE...
With painting complete, we return to Wisconsin to nail on the shingles and get the hardware (hinges, latch, etc.). The library is also measured so we can determine how big the base and post support will need to be.


If you look carefully in that last photo, inside at the top of the arch, you'll see another support Jon added to keep the roof level (the shingles add a lot of extra weight). You can also see the plexiglass window has been added (that was a nightmare to cut out).

Don't worry, for you little free library construction fans out there, we'll do a full diagram walk-through of the library in the final post with some additional images.

That's it for now--next up in the series: The Door!

Sunday, November 4, 2012

Building the Library of Justice: Part 1 - Planning

The FIRST thing that everyone asks after seeing the Library of Justice is "how did you build it?" which is usually met by a very abbreviated story of the process, people and time involved. But we promised to do it--er, justice, so here's the full story!

OVER A YEAR AGO...
When we were looking to purchase our first home we'd learned about little free libraries and the benefits they bring to neighborhoods. For me though, it was like lightning had struck! Right away I began to think about the potential for an LFL dedicated to comics.

Emily's father, Jon, agreed to help with construction. After discussion, we decided we needed a sketch to work from....

PHASE I: BLUEPRINTS
Having little-to-no draughtsman skills I asked our good friend and architect Joe Allen to help provide a working blueprint for Jon and I to use as a guide. Not only did Joe come through, he provided two unique versions with varied proportions to give us the most flexibility in the construction phase--which proved to be a wise decision.


To start, I gave Joe a few images I'd printed from various sources including still shots of the Hall of Justice from the Superfriends TV show, an action figure playset, and a fan-made creation that had an exceptionally well proportioned facade--as well as images of the REAL building that inspired it all, the  Cincinnati Union Station (yes, it's an actual building!) upon which the comic version was originally based.


Below are a few images of Joe plying his trade, sketching the first draft of the library to what we consider "factually accurate" for the building. The problem we eventually discovered is it would have made for a really wide shelf (we called this the "wide version").

.

Joe takes careful measurements to ensure our proportions are right...


Joe did an alternate "tall" version, based loosely on the playset that would be more squared-off.


I'd originally thought the doors would be inside the facade. But after working on some isometric views of the box, Joe realizes that the entire facade will need to be the door to the library if we want it to be accurate. This means heavy-duty hinges are in store!


More to come, stay tuned for Part 2 - Construction!